Get the light right first
Exposure
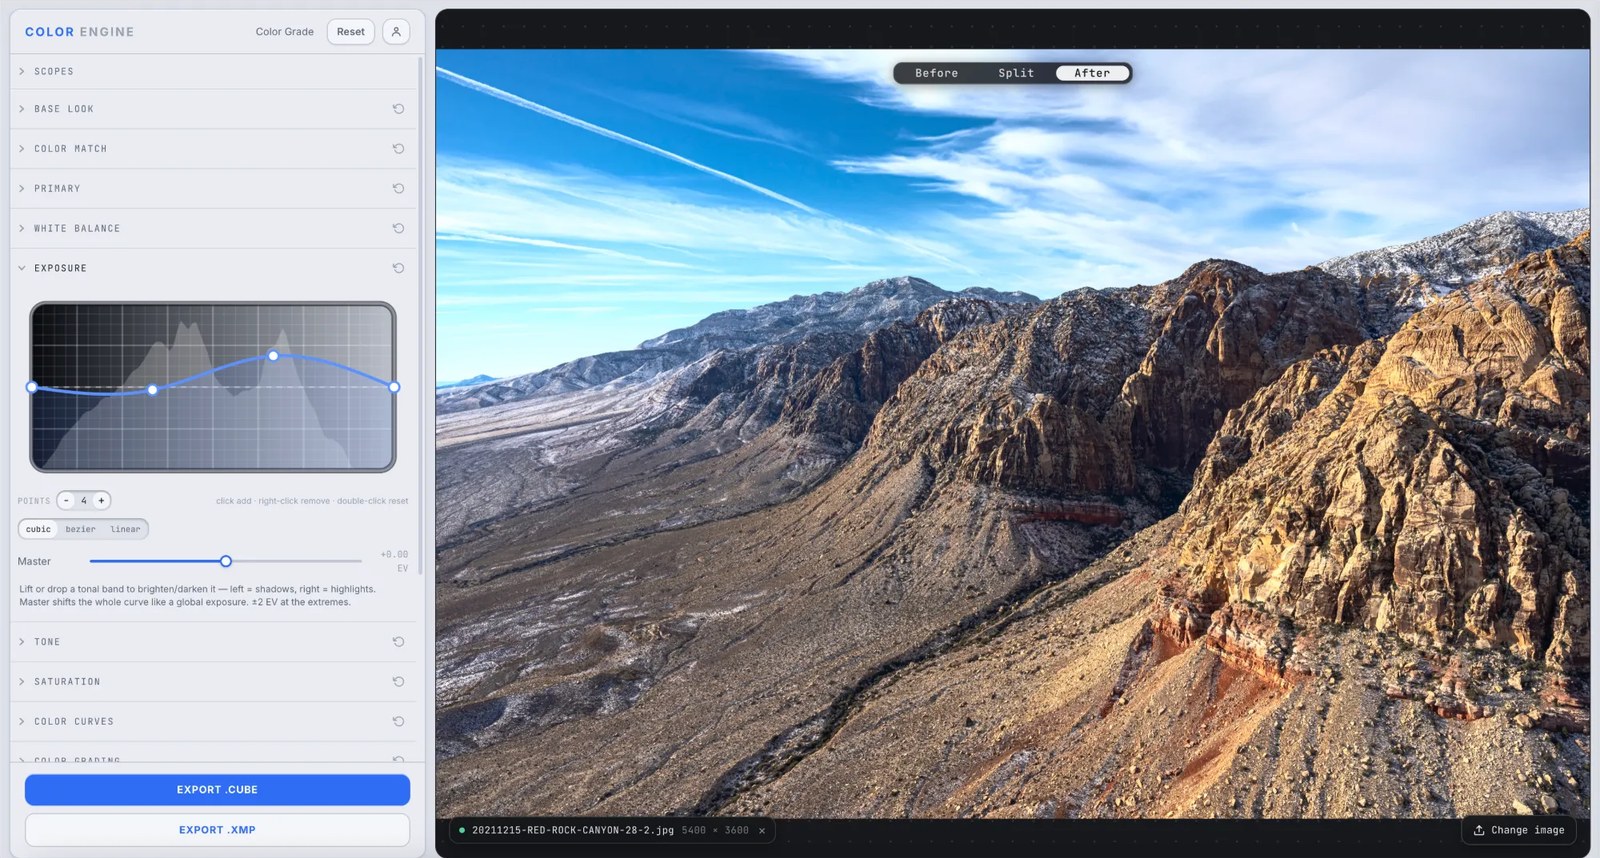
Before color, brightness. Exposure is a tonal curve for light — lift or drop any band from shadows to highlights, or shift the whole frame with one Master EV move — so every grade after it has room to breathe.
Brightness, on a curve
Lift or drop any tonal band — shadows to highlights — with a Master EV for the whole frame.
What it is
Exposure is a tonal curve for brightness. Grab any band — shadows on the left, highlights on the right — and lift or drop it to brighten or darken just those tones while the rest of the image holds.
A Master control shifts the whole curve up or down like a global exposure, ±2 EV at the extremes. Get the light right here and color falls into place; get it wrong and you're fighting muddy shadows or glassy highlights through every later tool. (Contrast and the shape of your tones live next door in Tone.)
The controls
Tonal curve
Grab a band and lift or drop it — left is shadows, right is highlights. Brighten or darken any zone of the image directly on the curve.
Master (EV)
Shifts the whole curve up or down like a global exposure — a clean overall brightness move, ±2 EV at the extremes.
Points & interpolation
Click to add a point, right-click to remove, double-click to reset; choose cubic, bezier, or linear between points.
What to do with it
Where Color Match earns its place in a real grade.
Rescue an underexposed shot
Lift the master exposure, then open the shadows to recover detail the murk was hiding.
Pull back a blown highlight
Roll the highlights down to recover a sky or a window — as long as it isn't fully clipped.
Open shadow detail
Lift just the shadows to reveal what's in the dark without washing out your mids.
Match exposure across a set
Level every clip to the same brightness on the waveform so a sequence reads consistent.
Field tips
- Judge exposure on the waveform, not your monitor — the scope doesn't care how bright your room is.
- Recover highlights before you add contrast; contrast pushes bright tones further toward the clip.
The science
The part nobody else explains
Dynamic range, and where detail lives
A camera captures a finite range from black to clipping. Exposure decides where your subject sits inside it; recovery pulls back detail that's near — but not past — the clip. Once a tone is fully clipped, there's nothing to recover.
Why exposure comes before color
Color operations behave predictably on well-exposed tones and fall apart on crushed or blown areas, where there's simply no color to work with. Set the light first, then grade on top of it.
One curve, global and local
The Master shifts every tone together; grabbing a band on the curve targets just that slice of brightness. That split is what lets you raise the whole image and still rescue a sky — or open shadows — without flattening the tones between.
Frequently asked
Can I recover a blown highlight?
Only if it isn't fully clipped. Drop the highlight end of the curve and any detail still near white comes back; if it's pure white across all channels, it's gone.
Exposure vs brightness — same thing?
Close. The Master shifts the whole tonal curve the way more light on the sensor would; grabbing a band then reshapes just part of the range.
Should I expose to the right?
On capture, yes — more signal means cleaner shadows. In the grade, just place your tones where they read best and use recovery for the extremes.
Related features
Try Exposure on your own shot
Build a look, match it across a set, and export a LUT or preset in minutes — free for 14 days, no installs.