Shape the light
Tone
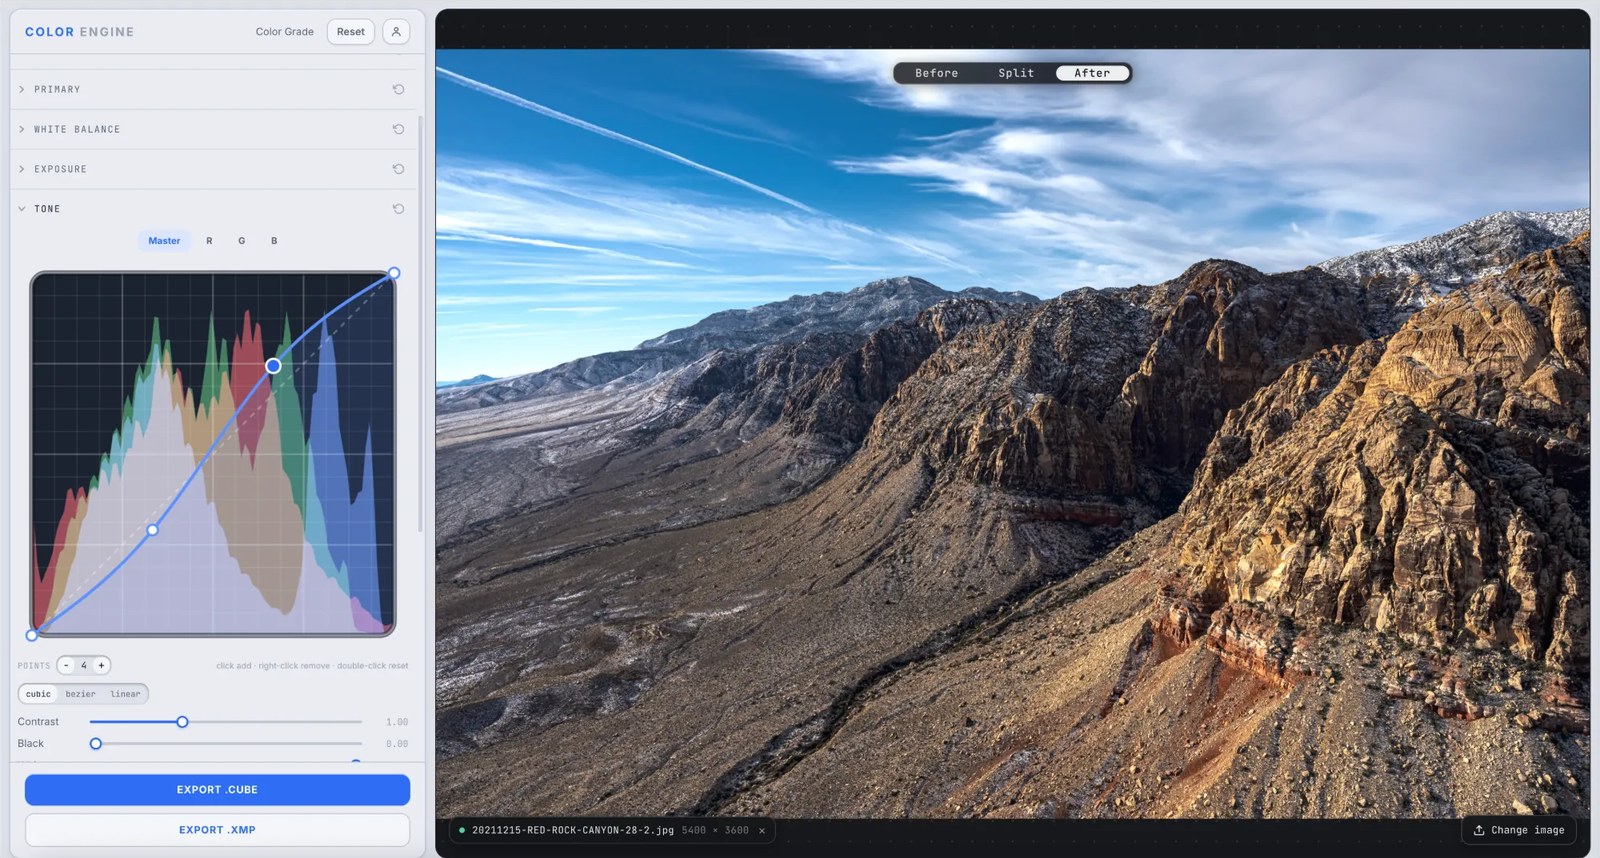
Exposure sets how bright; Tone sets the shape. A tone curve — master, or red, green, and blue on their own — plus quick Contrast and Black controls. This is where a flat capture gets its punch, or a harsh one gets tamed.
Master, plus red, green, and blue
A tone curve per channel, with Contrast and Black for the quick moves.
What it is
Where Exposure decides how bright, Tone decides the shape — how far apart your lights and darks sit, and how each color channel bends across the range. It's a full tone curve: pull the master for contrast, or switch to the Red, Green, or Blue curve to shape color by tone.
Two quick sliders sit beneath it — Contrast spreads the tones from the center, Black anchors (or lifts) your darkest point — so you can get most of the way there before you ever place a curve point.
The controls
Master curve
The luma tone curve — steepen it for contrast, ease it for a softer image. Add points to choose exactly where the contrast bites.
Red / Green / Blue curves
A curve per channel — lift blue in the shadows for cool blacks, drop it in the highlights for warm whites. Color, shaped by tonal region.
Contrast
Spreads the tones apart from a center point — the fast way to add or pull back punch without drawing a curve.
Black
Sets where your darkest tones land — anchor true black, or lift it off the floor for a faded, filmic look.
Points & interpolation
Click to add, right-click to remove, double-click to reset; cubic, bezier, or linear between points.
What to do with it
Where Color Match earns its place in a real grade.
Add punch to a flat log shot
A gentle S on the master curve — or a nudge of Contrast — snaps soft, grey log footage to life.
Tame harsh contrast
Ease the master curve and lift Black to soften a punishingly contrasty capture.
Split-tone by channel
Cool the shadows on the Blue curve and warm the highlights — a teal-and-orange look built right in the tone curve.
Set a faded black
Lift Black just off the floor for milky, cinematic shadows.
Field tips
- Watch the waveform as you steepen the curve — it's the fastest way to see when you're about to crush blacks or clip whites.
- Keep a point anchored in the mids so a contrast move doesn't drag your skin tones around with it.
- A faded-black look lives almost entirely in the Black control; lift it just off the floor.
The science
The part nobody else explains
Contrast is slope
Steepening the curve around its center stretches those tones apart — more separation, more contrast. Flattening it compresses them. The Contrast slider is just that move on rails.
Per-channel curves are color by tone
Bend the Blue curve's shadows and you've added blue to the darks only. Targeting color by tonal region is what lets you put different color in the shadows than the highlights — something a single white-balance move can't do.
Black sets the floor
Where you anchor Black decides how much of the range the image uses. Pin it to true black for maximum depth, or lift it for a soft, filmic base.
Exposure, Tone, and curves
Exposure shapes brightness; Tone shapes contrast and per-channel color. Both ride on curves under the hood — Tone just adds the Contrast and Black shortcuts most images want first.
Frequently asked
Contrast slider or the curve?
The Contrast slider is a one-move steepening of the master curve around its center; the curve lets you place that contrast exactly where you want it, or shape one channel at a time.
Can I shape color here, or just contrast?
Both — switch the curve to the Red, Green, or Blue channel to push color into specific tonal regions, the same way you'd build a split-tone.
Why lift the Black point?
Lifting Black off the floor gives you milky, faded shadows — the classic filmic base. Pin it down instead for maximum depth and punch.
Related features
Try Tone on your own shot
Build a look, match it across a set, and export a LUT or preset in minutes — free for 14 days, no installs.