Bend the color space by hand
Mesh Warp
A grid laid over the color wheel, every node draggable. Push one hue without touching its neighbors, pull a region inward to desaturate, reshape the whole color space directly — the most surgical color tool in the studio.
Warp the wheel by hand
Every node draggable — shift a hue, desaturate a region, reshape the color space.
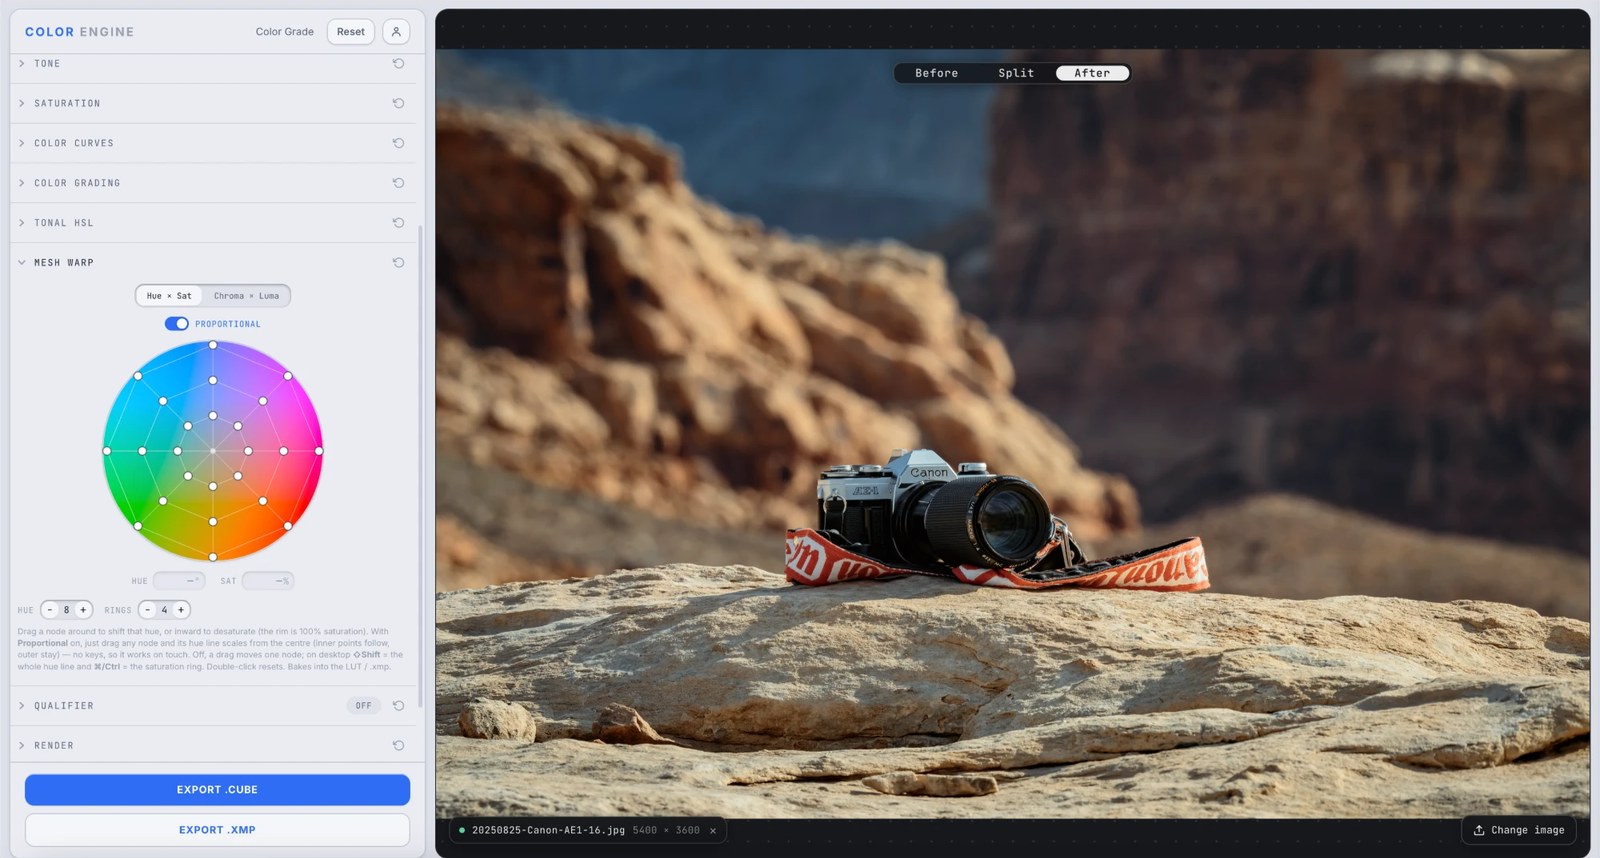
What it is
Mesh Warp lays a grid of nodes over the color wheel and lets you drag any of them. Move a node around the wheel to shift that hue; pull it toward the center to desaturate (the rim is full saturation). It's hands-on color remapping — reshape the color space exactly where you want.
Switch between a Hue × Saturation view and a Chroma × Luma view, set how many hue segments and rings the mesh has, and it all bakes into your LUT or .xmp.
The controls
Hue × Sat / Chroma × Luma
Two views of the mesh — warp by hue and saturation, or by chroma and luma, depending on what you're reshaping.
Proportional
On, dragging a node scales its whole hue line from the center (inner points follow, outer stay) — smooth and touch-friendly. Off, you move one node at a time.
Drag a node
Around the wheel shifts that hue; inward desaturates it. On desktop, Shift moves the whole hue line and ⌘/Ctrl the saturation ring. Double-click resets.
Hue / Rings
How many hue segments and concentric rings the mesh has — more nodes for finer control, fewer for broad, smooth moves.
What to do with it
Where Color Match earns its place in a real grade.
Fix one stubborn hue
Shift a specific orange without dragging the reds or yellows around it.
Desaturate a color family
Pull a region of the wheel inward to calm just those colors, leaving the rest at full strength.
Reshape a whole look
Warp the entire wheel into a custom palette that no single slider could reach.
Rescue an out-of-gamut color
Pull an over-intense hue inward so it holds detail instead of clipping.
Field tips
- Start with Proportional on for smooth, natural moves; switch it off for surgical single-node tweaks.
- Fewer rings and segments give smoother results — add nodes only where you need precision.
The science
The part nobody else explains
Warping the color space, literally
Most color tools apply a formula; Mesh Warp lets you move the color space by hand. Each node is a control point, and the mesh interpolates smoothly between them — so a local push stays local while the rest of the wheel flows around it.
Hue is angle, saturation is radius
On the wheel a node's angle is its hue and its distance from center is its saturation. Drag around to remap hue; drag inward to desaturate. The rim is 100% saturation, the center is grey.
Proportional vs single-node
Proportional scales a whole hue line from the center, keeping transitions smooth — ideal for broad, believable shifts. Single-node is surgical, for when one exact color must move and nothing else.
It bakes like everything else
However you warp the mesh, it resolves into the same LUT/.xmp as the rest of your grade — deterministic and portable.
Frequently asked
How is this different from Tonal HSL?
Tonal HSL gives you fixed bands (reds, blues…); Mesh Warp lets you place and drag nodes anywhere on the wheel for arbitrary, freeform remapping.
What does Proportional do?
It scales a whole hue line from the center as you drag, for smooth moves; off, you move one node at a time.
Hue × Sat vs Chroma × Luma?
Two views of the same mesh — warp by hue/saturation, or by chroma/luma, depending on what you're reshaping.
Related features
Try Mesh Warp on your own shot
Build a look, match it across a set, and export a LUT or preset in minutes — free for 14 days, no installs.